Enable Camera Access During macOS Installation
When installing on macOS, you'll need to enable the camera system extension. Follow these steps to enable it:
macOS 15 Sequoia and Later
1. Open System Settings and go to General > Login Items & Extensions.
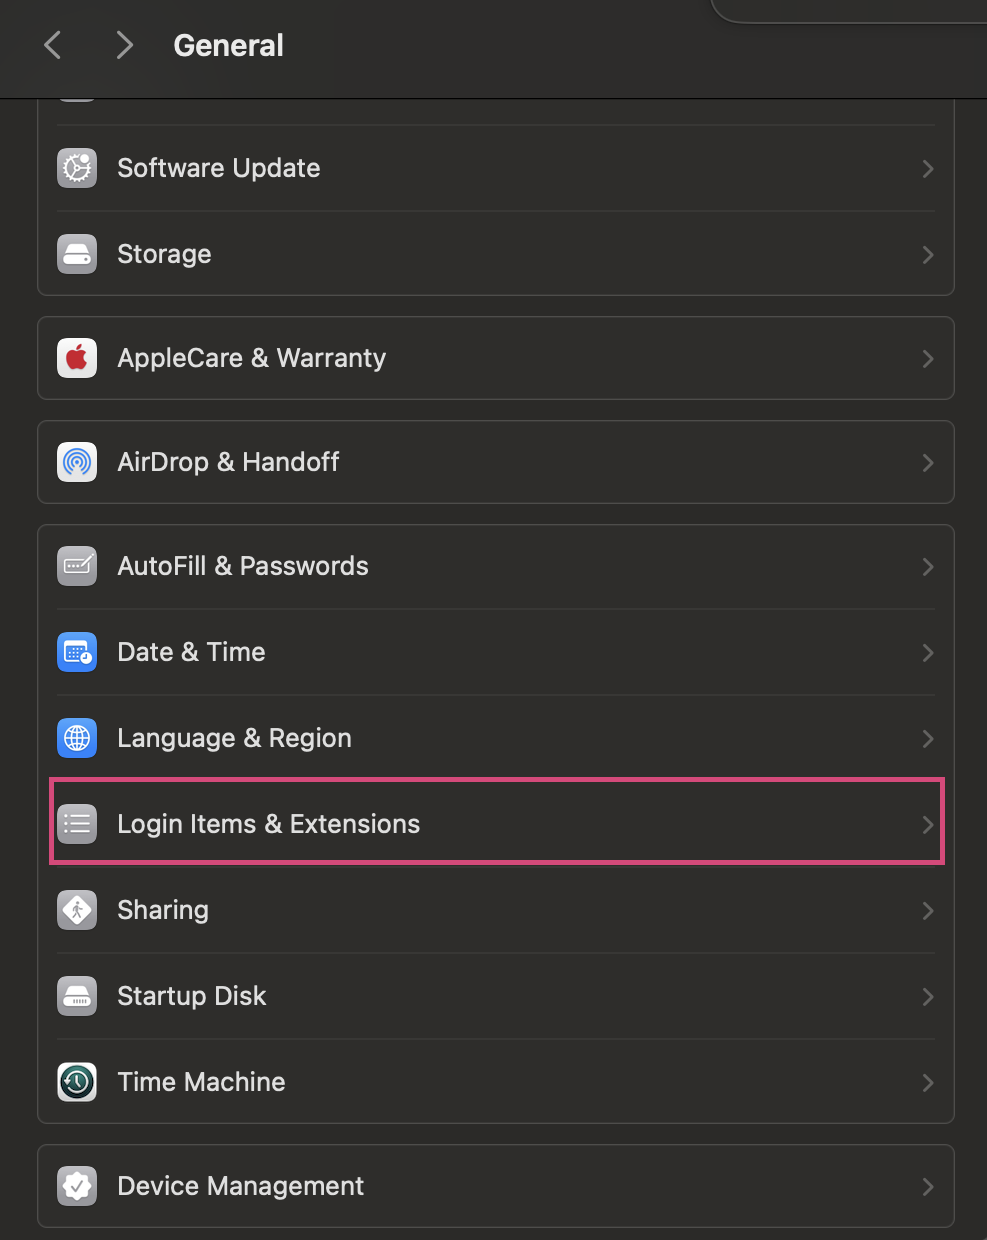
2. In Login Items & Extensions, scroll down to find Camera Extensions and click the info icon (ⓘ) on the right.
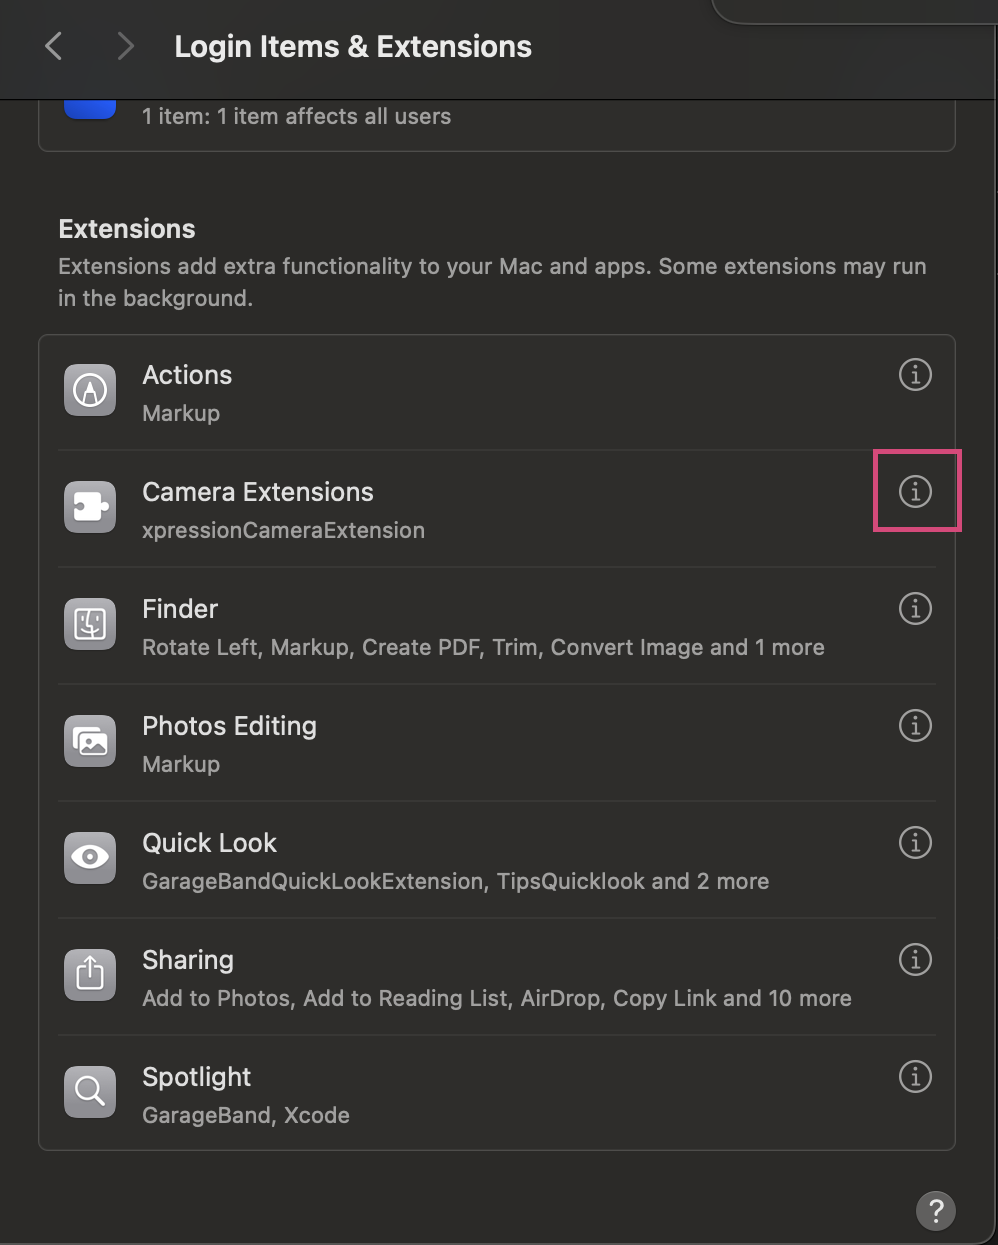
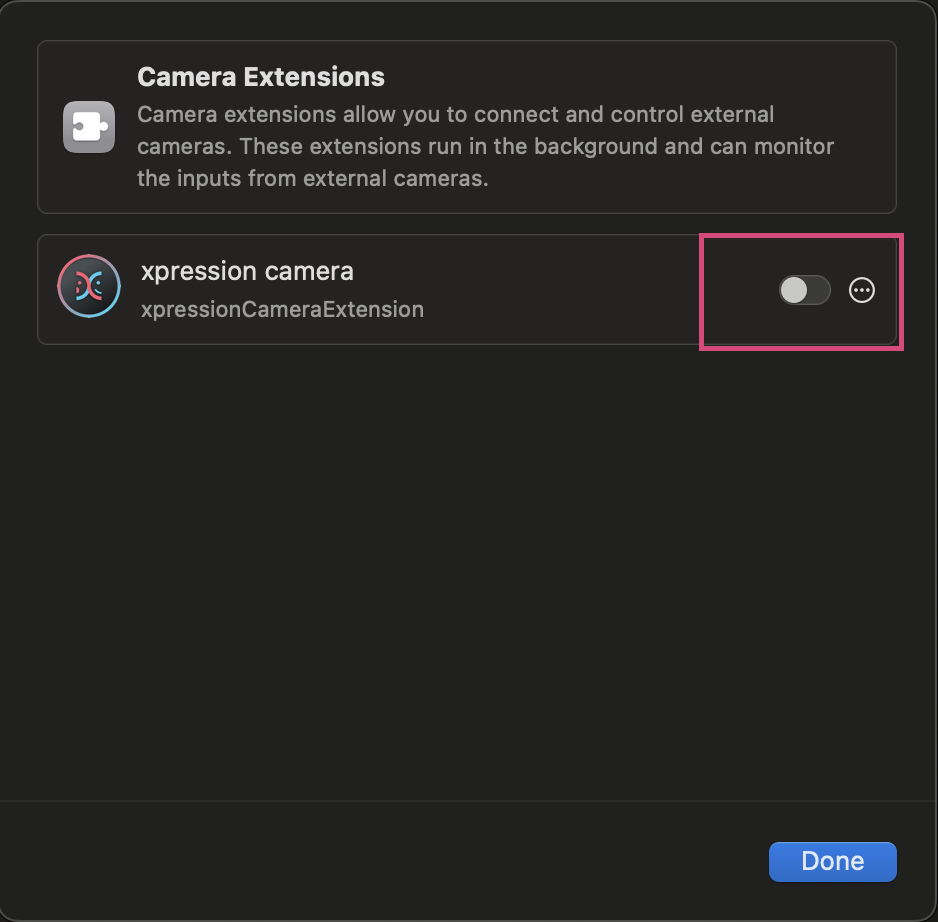
3. Enable the xpression camera extension.
4. Restart the xpression camera app.
macOS 14 Sonoma and Earlier
1. Open System Settings and go to Privacy & Security. Scroll down and click "Allow" to enable the camera system extension.
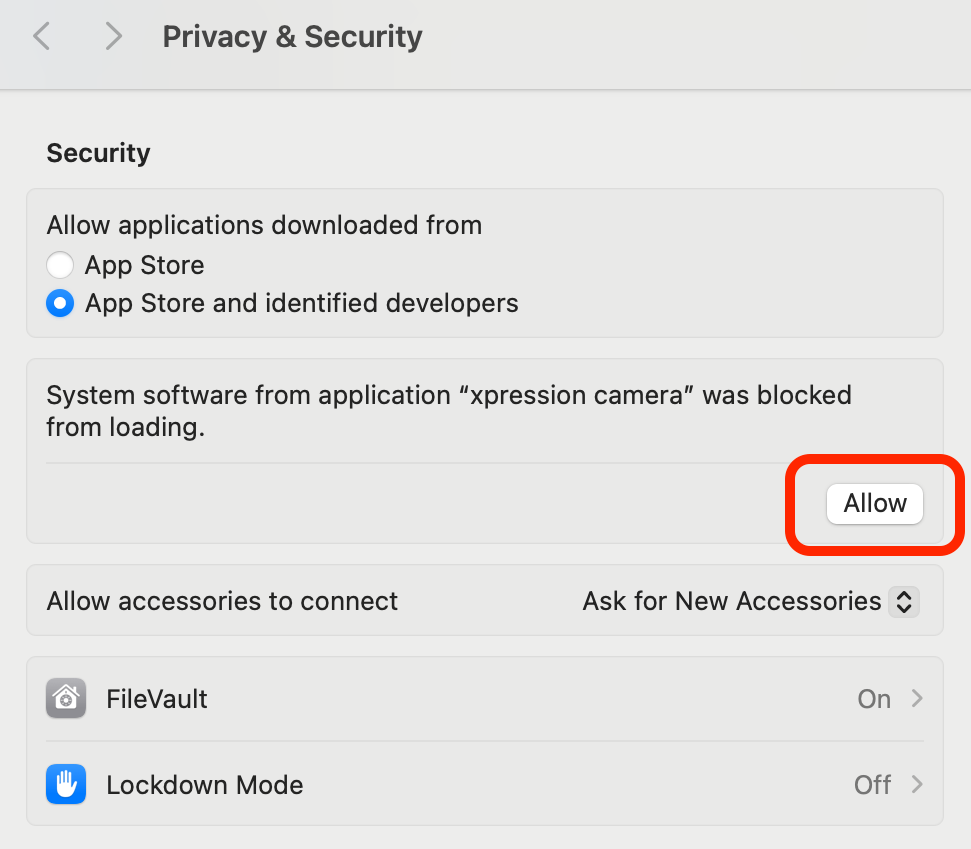
2. Restart the xpression camera app.
FAQ
The camera isn't working on macOS
Please enable the camera system extension by following these steps. Note that the procedure differs between macOS 15 or later and macOS 14 or earlier.
The Record button is greyed out and recording never starts
Does this match what you are seeing?
- xpression camera opens normally and the camera preview works
- You click Record once, and the button immediately becomes dim
- No recording timer appears, and no video file is created
- Clicking Record again does nothing
- Only quitting and relaunching the app makes the button clickable again
xpression camera requires an available microphone in order to record. If the app cannot access one, recording will not start and the Record button stays greyed out. The steps below will resolve it.
Step 1 — Make sure your Mac has a microphone available
MacBook Air, MacBook Pro, iMac — a microphone is built in. Continue to Step 2.
Mac mini, Mac Studio, Mac Pro — these models have no built-in microphone. You must connect one and leave it connected. Any of the following will work:
- The microphone built into your webcam (for example Logitech BRIO, Brio 500, C920, C922)
- The microphone built into your display (for example Apple Studio Display, or most monitors that include a webcam)
- A USB microphone
- A wired or USB headset
- AirPods or a Bluetooth headset
- An audio interface with a microphone connected
Step 2 — Select the microphone in macOS
Open System Settings → Sound → Input, select your microphone, and speak.
The input level indicator should move as you speak. If it does not move, macOS itself is not receiving audio from that device — choose a different input device before continuing.
Step 3 — Allow xpression camera to use the microphone
Open System Settings → Privacy & Security → Microphone and make sure xpression camera is switched ON.
Step 4 — Quit xpression camera completely, then reopen it
Press Cmd+Q. Closing the window is not enough.
This step cannot be skipped. xpression camera checks for a microphone only when it starts up. If you connect a microphone, change the input device, or change the permission while the app is already running, the app will not detect the change until it is quit and reopened.
Step 5 — Click Record
A recording timer should now appear, and your video will be saved when you stop.
Still not working?
Contact us at feedback@xpressioncamera.com and include:
- A log file — reproduce the problem first, then open Terminal (Applications → Utilities → Terminal), paste the line below and press Return. A file named xpression-log.txt will appear on your Desktop; attach it to your email.
log show --last 15m --predicate 'process == "xpression camera"' --info --debug > ~/Desktop/xpression-log.txt
- Screenshots of System Settings → Privacy & Security → Microphone and System Settings → Sound → Input
- Your macOS version, Mac model, and xpression camera version
Can I record video without a microphone?
No. xpression camera requires an available microphone in order to start recording, including when you do not intend to capture any sound. If your Mac has no built-in microphone, please connect one before opening the app — see the steps above.
I connected a microphone but Record is still greyed out
Quit xpression camera with Cmd+Q and open it again. The app only detects microphones at startup, so a microphone connected while the app is running will not be recognised.
How can I uninstall the Mac version of xpression camera?
To uninstall the Mac app, please delete the following files:
/Applications/xpression camera.app
/Library/CoreMediaIO/Plug-Ins/DAL/XpressionPlugin.plugin
~/Library/Application Support/xpression-cam-macos
~/Library/Application Support/inc.embodyme.xpression-cam-menu-macos
~/Library/Application Support/inc.embodyme.xpression-cam-macos
~/Library/Preferences/inc.embodyme.xpression-cam-macos.plist
~/Library/Preferences/inc.embodyme.xpression-cam-menu-macos.plist
Those directories can open by choosing "Go" -> "Go to Folder" in Finder. Or those files can be deleted by opening Terminal.app and typing following commands.
sudo rm -r /Applications/xpression\ camera.app
sudo rm -r /Library/CoreMediaIO/Plug-Ins/DAL/XpressionPlugin.plugin
sudo rm -r ~/Library/Application\ Support/xpression-cam-macos
sudo rm -r ~/Library/Application\ Support/inc.embodyme.xpression-cam-macos
sudo rm -r ~/Library/Application\ Support/inc.embodyme.xpression-cam-menu-macos
sudo rm -r ~/Library/Preferences/inc.embodyme.xpression-cam-macos.plist
sudo rm -r ~/Library/Preferences/inc.embodyme.xpression-cam-menu-macos.plist
Note: The future version of xpression camera will feature an uninstall function.
Important: Please restart your mac to apply the change.
How can I uninstall the Windows version of xpression camera?
To uninstall the Windows app, please follow the steps below:
- Right click Windows icon
- Click Settings (or press windows+R -> type ms-settings: -> enter)
- Next, click Apps on the left side
- Then, click installed apps
- In the list of installed apps, you can find out where xpression camera is
- Once you found, click the button on the right side and you will see 'uninstall'
- Click 'uninstall', follow the instruction to uninstall xpression camera
How do I change my payment settings?
Please open the xpression camera app, and select "Manage Account" from the File menu (for Windows version) or the xpression camera menu (for Mac version).
What is commercial use?
Commercial use includes, but are not limited to, business meetings, earning income from video creation or live streaming on Youtube, Twitch, or other socials, promotional video creation, events, education, and customer services.
I have a question or request that isn't listed here
If you have a question or request that isn't listed here, email us at feedback@xpressioncamera.com.
How to Get Exclusive Assets
Record a video with xpression camera and post it on social media with #xpressioncamera to get exclusive assets!
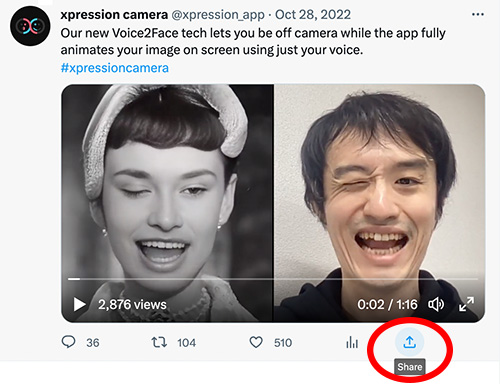
To obtain the assets, please follow these steps to copy the URL of your shared video post and paste it into the app.
Select the Share icon and choose Copy Link:

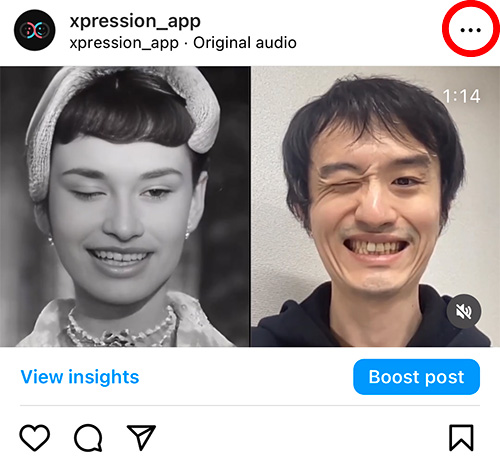
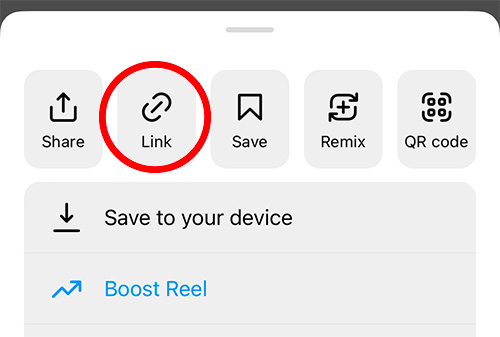
Instagram
Select the menu icon at the top-right corner and choose Copy Link:
TikTok
Select the menu icon at the bottom right and choose Copy Link:


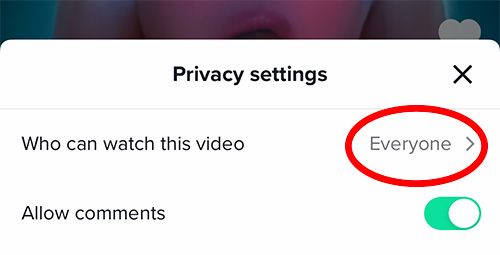
Please make sure everyone can watch this video in the privacy settings: